The Minecraft community seems to have an obsession with doing everything on YouTube. For some people that’s great, but as someone who is already a coder and I just need to know the environment-specific details for coding for Minecraft I have a really hard time sitting through an hour of tutorial videos just to get the four things I needed to know that I didn’t already know how to do. This is where having a text and pictures version of a tutorial comes in handy, so you can skim through it looking for the parts you still need to know, and easily skip over the stuff you already know. Another friend of mine was also recently trying to get into writing a plugin for Spigot, and everything I could find to point him at which was text-based rather than a YouTube video was very outdated, had instructions that were no longer relevant because Bukkit and Spigot and Eclipse have all evolved since then, etc. So I figured I’d write one, and here it is!
Update: since writing this up, I discovered a very nice page on the Spigot Wiki documenting much of this, which seems to be mysteriously absent from the search engine searches I did trying to find this information (or at least ranked low enough that all the YouTube videos and a bunch of forum posts that skirt this issue outrank it). How to create a Minecraft/Bukkit/Spigot plugin on the SpigotMC website. I’m posting this anyway because I do a few things differently. Pick your flavor. 🙂
Setting up your development environment
Install Java
You need the Java Development Kit, not the Runtime Environment. Download the Java SE JDK from Oracle’s site. Make sure you get the JDK, not the JRE, and make sure you have the correct one for your operating system. Java.com only has JREs, you have to go to Oracle’s site for the JDK. Linux users can try installing the java-8-openjdk package.
Note for OS X users: OS X no longer ships Java by default. It will automatically install if you try to run something that needs Java, however, the version it installs is old (Java 6) and Bukkit/Spigot development requires at least Java 7, so you will need to download the newer Java even if you already have the system Java.
Download and Build Spigot
You need to link against Spigot in order to compile plugins, so you’ll need a local copy of Spigot to link to, even if you never actually run it.
Download BuildTools.jar from https://hub.spigotmc.org/jenkins/job/BuildTools/
Place it in an otherwise empty directory. Open a command prompt (or a terminal window) and navigate to the directory you placed it it. Run the following command to build it:
java -jar BuildTools.jar
This will probably take a while. If all goes well, you should get a file called Spigot-1.14.2.jar in the same directory with BuildTools.jar (the version number in the filename may be different if Spigot has been updated since I posted this). Remember where this directory is, you’ll need it later when creating the project in Eclipse.
Install Eclipse
Plugin development is done with a Java IDE. If you already have a favorite Java IDE, I imagine you can make it work, but if you don’t, I recommend Eclipse, and that’s what my instructions will be based on.
You can get Eclipse here: http://www.eclipse.org/downloads/
Most Linux distributions have Eclipse packaged already and you can probably use your package manager to install it. Your mileage may vary in getting it to work. Personally, I’ve had issues getting Eclipse plugins to work correctly because updating plugins sometimes breaks the way the packager packaged the main app, and sometimes plugins want a newer version of Eclipse (Ubuntu ships an older version), so I use a copy of Eclipse downloaded from eclipse.org rather than the one Ubuntu ships.
If you have more than one version of Java installed (OS X users, this is probably you), go into Eclipse’s preferences, click the triangle next to “Java”, and look for the “Installed JREs” section. Make sure the one you just installed is listed in there, and checkmarked. If it is not, click Add, then click on Directory to the right, navigate to where you installed the Java JDK, and find the “jre” directory inside it. On OS X, Oracle’s installer will install inside /Library/Java/VirtualMachines/. Examples:
Mac OS X:/Library/Java/JavaVirtualMachines/jdk1.8.0_31.jdk/Contents/Home/jreLinux:/usr/lib/jvm/java-8-openjdk-amd64/jre
Install a YAML editor plugin to Eclipse
The file you create that tells Spigot how to interact with your plugin is in YAML format. As shipped, Eclipse does not understand how to edit YAML files (even though it’s really just a text file). There are several plugins that will teach it how, though.
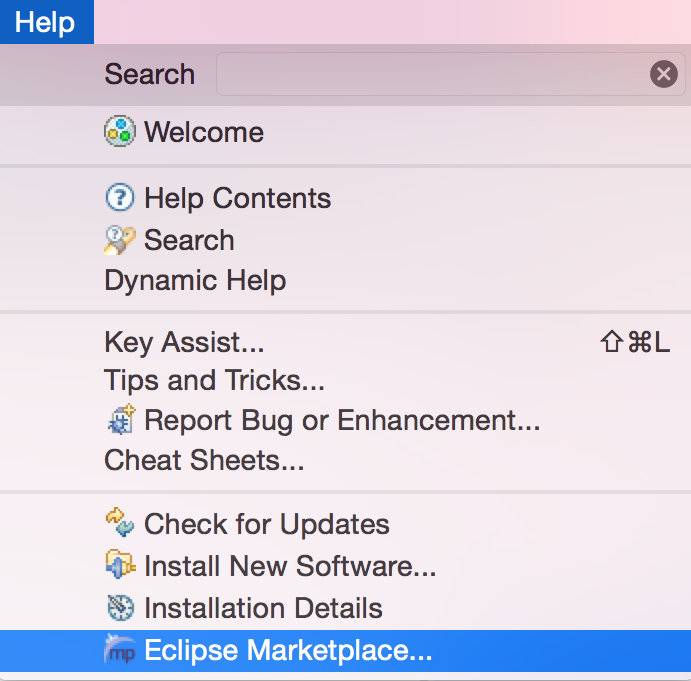
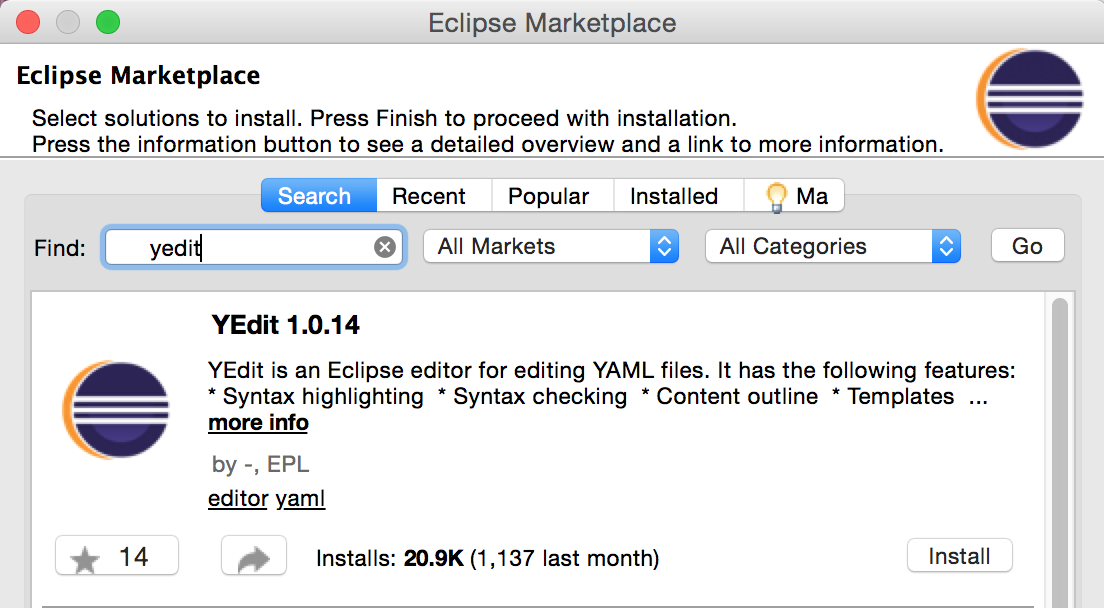
Go to Help -> Eclipse Marketplace, and type “yaml” into the Find box. There are several plugins that can do this, find one you like and install it.
UPDATE 2019/07/13: I used to recommend YEdit here (at the time I wrote this, it was the only one), but it’s gone out of the Eclipse Marketplace. There are several others available now, any of them should work.
Creating your first project in Eclipse
Create the project itself
- Choose File -> New -> Java Project
- Enter the name of your plugin
- Choose Next (not Finish)
- Click the Libraries tab.
- Click Add External JARs…
- Choose the shaded version of the Spigot-API JAR file from the Spigot directory that you compiled above. Within the directory with BuildTools.jar the API file will be in
Spigot/Spigot-API/targetand will probably be named something likespigot-api-1.14.2-R0-SNAPSHOT-shaded.jar - Toggle the triangle to the left of spigot-api
- Choose Javadoc Location
- Click Edit…
- In Javadoc location path, enter:
https://hub.spigotmc.org/javadocs/spigot/. This will allow the autocomplete in Eclipse to autocomplete Spigot API objects and methods. - Click OK
- Click Finish
Create a package
- Choose File -> New -> Package
- Enter the name of your package. This is usually structured like a domain name, but in reverse. It should start with something that identifies you, and then have the name of the project at the end, and be all lower-case. Minecraft itself is net.minecraft.server for example, Spigot is org.spigotmc, and the Bukkit plugin API is org.bukkit.plugin. I’ll use tld.example.myplugin in the examples.
- Click Finish
Create the Main class
- Choose File -> New -> Class
- Enter the name of the class which will be loaded by Spigot when it loads the plugin. You can really name this anything you want (we’ll deal with telling Spigot how to find it later), but for simplicity I’ll call it Main in the examples.
- Next to Superclass, click Browse…
- In the search box, type JavaPlugin, and choose what should be the only match (org.bukkit.plugin.java)
- Click OK
- Click Finish
It should automatically open in the editor, and you should now be looking at code that looks like this:
package tld.example.myplugin;

import org.bukkit.plugin.java.JavaPlugin;

public class Main extends JavaPlugin {

}
There are two functions defined by the API which you are required to implement. Those are onEnable and onDisable, which get run when your plugin is enabled or disabled. They don’t need to do anything, but if you have any resources that need allocating or disposed of, those are the places to do it. Add those two functions to your Main.java file, so that it looks like this:
package tld.example.myplugin;

import org.bukkit.plugin.java.JavaPlugin;

public class Main extends JavaPlugin {

    @Override
    public void onEnable() {

    }

    @Override
    public void onDisable() {

    }

}
Create the plugin.yml file
- Choose File -> New -> File
- Select the top-level folder of your project (the project name)
- for the File name enter
plugin.yml - Click Finish
It should open in the editor. If it doesn’t, you likely forgot to install YEdit up at the top of this tutorial.
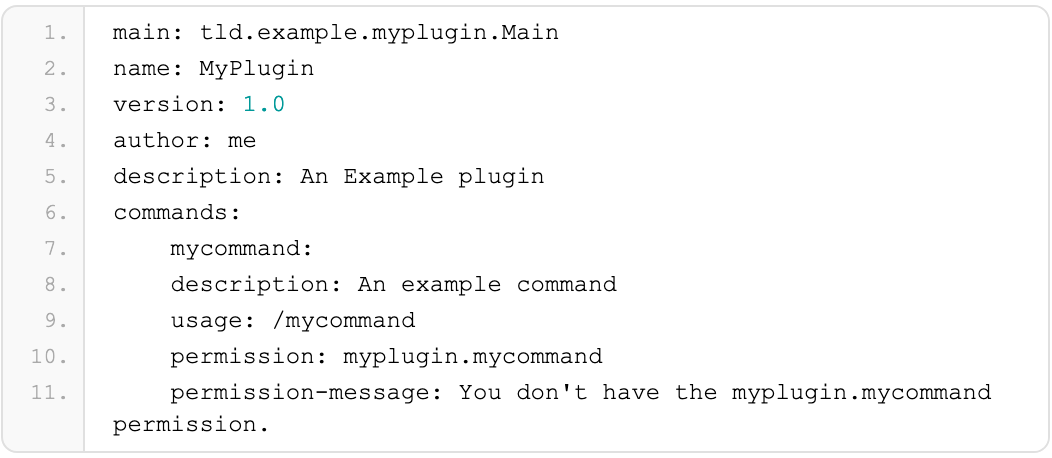
This file will be in YAML format, and describes to Spigot how to interact with the plugin. The top of the file leads off with some basic information about the plugin, and is then followed by a description of the commands which are made available by the plugin.
main: tld.example.myplugin.Main
name: MyPlugin
version: 1.0
author: me
description: An Example plugin
commands:
    mycommand:
    description: An example command
    usage: /mycommand
    permission: myplugin.mycommand
    permission-message: You don't have the myplugin.mycommand permission.
The “main:” line needs to list the package and class name of the class which is loaded by Spigot when it loads the plugin’s jar file. “version”, “author”, and “description” are human readable, and shown to the user by the /plugins and /help commands.
The “commands:” block should contain one line for each command you implement. If it’s not listed here, Spigot won’t send the command to you when users use it.
Within each command’s block, the “description” and “usage” sections are shown to the user when they use the /help command. The “permission” line describes which permission grants access to the command. “permission-message” is shown to users who don’t have permission to use it if they try to. The “permission” should start with the name of the plugin, a dot, and then an arbitrary permission name. You can also borrow another plugin’s permission or a core permission. For example, if your plugin adds additional features to MultiWorld you could require “mw.admin” permission or so forth. You can leave out this line if you want it available to all users.
Create your build script
To be able to install the plugin into Spigot, you need to create a JAR file (Java ARchive). You can use File -> Export -> Java -> Java JAR to create it, but then you end up having to specify which files to include every time. In the long run, it’s easier on you to set up Eclipse to automatically build it. So in this step we’ll be creating a build script that defines the contents of the JAR file so that Eclipse can do that.
- Go to File -> New -> File
- Choose the top-level folder (the name of your project)
- For File name enter build.xml
- Click Finish
It should open in the editor.
Paste in the following:
< ?xml version="1.0" encoding="UTF-8"?>
<project name="MyPlugin" default="makejar" basedir=".">
    <target name="makejar" description="Create a jar for the project">
        <mkdir dir="target"></mkdir>
        <jar destfile="target/${ant.project.name}.jar">
            <fileset dir="bin"></fileset>
            <fileset file="plugin.yml"></fileset>
        </jar>
    </target>
</project>
Where it says “MyPlugin” at the top, you’ll want to replace with your project name. Also, WordPress adds a space between the < and the ?xml in the first line because it looks too much like the syntax used to start a php code block. You’ll need to remove that space for the file to be valid.
Tell Eclipse to use your build script
- Right-click (control-click or two-finger-click on Mac) on the project name and choose Properties.
- Choose Builders on the left side.
- Click New…
- Choose Ant Builder and click OK
- Set the name to
Make JAR - For Buildfile, enter
${project_loc}/build.xml(literally, including the $ and the braces) - Click the Refresh tab
- Checkmark Refresh resources upon completion
- Choose The project containing the selected resources
- Switch to the Targets tab.
- Click on Set Targets… next to each of “Auto Build” and “During a ‘clean'” and just click the OK button on the resulting dialog.
- Click OK to close out of the Edit Configuration window.
- Click OK to close out of the Properties window.
At this point you should have a working project, and any time you make changes to anything in your project, it will automatically rebuild the plugin’s jar file in the target directory. As long as you’ve been saving your changes, it should always be up-to-date with your code.
Start Coding
If you’ve followed the above instructions up to this point, you now have a working plugin file which does absolutely nothing, but has all of the necessary framework.
Oh, one more thing.
The plugin.yml file included a description of a command just to use an example of how to put that in the plugin.yml file. I would be remiss if I didn’t also give you the sample code for actually handling that command. That goes in Main.java by adding an onCommand() handler function. Your final Main.java would look like this:
package tld.example.myplugin;

import org.bukkit.command.Command;
import org.bukkit.command.CommandSender;
import org.bukkit.plugin.java.JavaPlugin;

public class Main extends JavaPlugin {

    @Override
    public void onEnable() {

    }

    @Override
    public void onDisable() {

    }

    @Override
    public boolean onCommand(CommandSender sender,
                             Command command,
                             String label,
                             String[] args) {
        if (command.getName().equalsIgnoreCase("mycommand")) {
            sender.sendMessage("You ran /mycommand!");
            return true;
        }
        return false;
    }

}
Additional Resources
Spigot Plugin Development Page
Spigot API Reference
UPDATED 2016/05/06: Still works in 1.9, so updated references accordingly. Fixed step 6 in creating the project to use the shaded version of the API file. Thanks to several people in the comments for pointing it out.
UPDATED 2017/02/21: I haven’t had a chance to try it myself recently, but multiple people have said in the comments that this still works in 1.11.x, so I’ve updated the references accordingly.
UPDATED 2019/07/13: Likewise. Haven’t tried it myself, but people are saying it still works in 1.14.x in the comments, so updating the title and references. Also added a note about YEdit being gone from the Eclipse Marketplace.
UPDATED 2019/07/22: Looks like WordPress finally broke the syntax highlighter plugin I’ve been using that hasn’t been updated in 4 years, just replaced it with a Gutenberg-compatible one and attempted to fix the formatting of the code. Build.xml in particular was completely hosed, it should be fixed now.
This is a great tutorial, I really enjoyed the build script and the fact that you actually install YEdit to edit yml files properly (this is something I also covered in my online course spigotcourse.org).
Nevertheless, I find text articles easier when it comes to updating, but in my opinion following a video series is more handy because you get to explain more of the background and can make it more entertaining (people usually skim through text and can miss parts).
I get that coding should be fun, but I’ve been looking for exactly what is in this article and I’ve watched about 10 videos and not had everything here come over to me at all. That’s like 2 hours worth of time spent trying to learn that have been ultimately wasted. There are so many videos that claim to show everything, then you get 5 or 10 minutes in and realize that the video is skipping large parts or even worse: is done by someone who doesn’t even really know what they’re doing themselves. Entertainment is all well and good, but if sacrificing half an hours worth of jokes gains me hours worth of time spent not fiddling with things… just call me Mr. Entertainmentless. This is not a subject for me that I think benefits from having to pause and return many times, and then skip back when something isn’t working as expected.
Additionally: people, when looking for technical information, will usually skim through videos and miss parts. There’s not much to miss when you’ve got a step by step list right in front of you. Sure, you could be getting more entertainment while I’m doing it, but multitasking isn’t my strong suit and it’s legitimately distracting when I’m trying to concentrate on learning.
I dont know why YEdit dont shows to me
YEdit isn’t in the marketplace anymore. Just look for YAML.
Thank you for an excellent tutorial. I also prefer text/pictures instead of YouTube-videos for this type of content.
I tested this with a 12.2-version of the Spigot-API, and it worked fine.
i cant find YEdit in the store
“Yaml Editor” works just as well. As long as it can open yaml files you should be fine.
Yedit is no longer in the Eclipse Marketplace, but you can find another YAML Editor (i recommend the Eclipse’s one) in the marketplace, or install an external editor, like Sublime Text.
its not in the marketplace anymore just search “yaml” and you will find a couple of other editors
¡ Still Working on 1.14.2 !
Nice tutorial, comprehensible steps that makes you understand everything.
This is great! You can also specify target versions for your build tools! (This helped me target the latest client version)
https://www.spigotmc.org/wiki/buildtools/#latest
When making the build.xml file and after inputting it says ‘premature end of file’. Do you know how to fix this?
Did you ever find a fix for premature end of file?
WordPress upgrade hosed my syntax highlighter (and truncated the build.xml file). I just fixed it, grab a new copy from the post.
When I run the BuildTools in Windows PowerShell it does not create a spigot file but instead creates a lot of folders including a spigot folder which has just some random files in them, please help!
I don’t know much about building on Windows, sorry. Only done it on Mac and Linux.
I think he was talking about the files in the buildtools directory, he likely didn’t read the tutorial very well.
That’s because it’s doing more than just making a singular file. Go into the Spigot-API folder, then go into the target folder, and select the spigot-api-*Some version*-R0.1-SNAPSHOT-shaded.jar file and you’ll be golden 🙂
Thanks for this tutorial 😀
But I’m stucked, Eclipse don’t to see the Spigot API.
I get the error “The type org.bukkit.plugin.java.JavaPlugin is not accessible” when I want to import these package. But the Spigot-api…. .jar is in the Library tab.. I try to remove and re-download it but it doesn’t work…
Absolutely amazing tutorial. Best I’ve ever seen, easy to follow, and the bonus example to execute commands is really helpful for beginners.
Thank you so much! I will recommend this to everybody who needs help.
Hey everyone, despite how perfect this tutorial is, I just wanted to clarify a few things for the newbies:
* I tested this in both Mac OS X and on a Windows OS machine. Both work excellent as of 8/21/2019 (Time up uploading comment and on Spigot 1.14.4). I’m sure It’d work on Ubuntu as well.
* Read every step carefully: Seriously, if something isn’t working, read from the beginning and make sure you didn’t miss something.
* Get a dark theme for eclipse from Help->Eclipse Marketplace->Search tab (Should be there by default)->then in the search bar next to “Find:” look up dark them. It’ll make looking at the screen so much easier and you’ll feel like a legend while doing it lol
* You don’t NEED YEdit, but you NEED a yaml editor: It can be ANY Yaml editor in the eclipse store, but you can’t edit yaml files without installing a yaml editor. I suggest you choose one with high ratings.
* Plugin.yml should not be in the same directory as your Main.java or the build file won’t work and your plugin will fail to activate. This happens because you built the plugin to look for plugin.yml directly inside of the project itself, not inside of the package (Which is the domain you chose, his was the tld.example.myplugin), so if it can’t find it, the build file will spit errors at you and if you try to run the plugin on your server you’ll likely get an error saying that it can’t find your plugin.yml file
* Spigot 1.14 changed something in the plugin.yml : I haven’t coded too much since 1.14, but to get rid of the error, I believe you need to specify the api-version in the plugin.yml file. It won’t break the code if you don’t, but it’s good practice to remove the error before continuing.
* BEFORE you get into plugin development, I really suggest you learn a bit about Java beforehand. You don’t need to be a pro at all (That’s what this can help with 🙂 ), but it’s going to be really difficult if you have trouble grasping things like conditions, constructors, hashmaps, syntax, loops, etc
https://www.w3schools.com/java/ is a great way to get some surface knowledge on Java for free and it has practice problems you can try. It’s good review too and while you won’t become an expert from it, It’ll help a LOT with getting started.
Not sure if there’s anything else that a newbie might need clarification with, but this is such an amazing tutorial and I thought this might help anybody who’s newer to Java, Eclipse, or the Spigot API. I’m a bit of a newbie myself, but I wanted to optimize the previous way I set up projects and this was exactly what I was looking for.
PS. Reply to this with any questions and I’ll respond as often as I can.
Thank you
Literally took me two days of work to get this working as i am a total newbie, wish i had seen your summery earlier. I am still having one problem however, maybe you could help, when I make a new project and set up the build file it wont let me name it “Make JAR” because there is already one named Make JAR. Is this correct, am I doing something wrong?
I think they create a default one by that name now. It was just an example, you should be able to name it whatever you want. Maybe “My Make JAR” 🙂
Hey,
im not sure if im the only one with this problem. Im a newbie, i followed all the steps and downloaded a yaml editor, but when i create a new plugin.yml file and open it with the editor the file is blank. I tried another yaml editor aswell and tried creating a new project, etc. doesnt seem to work.
Help is appreciated
It *should* be blank when you first create it. You have to put the content in yourself. Unless you mean there’s nowhere to type…
When i enter ${project_loc}/build.xml
it says “External tool location does not exist” what does this mean?
“CommandSender” and “Command” in Main.java were highlighted red after following your tutorial.
I imported :
import org.bukkit.command.Command;
import org.bukkit.command.CommandSender;
in order to “fix” this problem. Not sure if it worked, because my command doesn’t exist when I add the plugin to the server.
Any ideas?
When I click “add external jars†and select the shaded spigot api jar file, and click open, nothing happens. Also I don’t see the triangle and I can’t find the Javadoc location thing 🙁 your tutorial is the farthest I’ve gotten on this in the past three days though, after watching hours of videos, so thanks.
I am trying to do this part: “Next to Superclass, click Browse…
In the search box, type JavaPlugin, and choose what should be the only match (org.bukkit.plugin.java)”
I typed in JavaPlugin in the search box but nothing shows up?
That means you missed steps 5 and 6 under “Create the project itself”
Fantastic tutorial!
It is amazing when everything just works!!! Very detailed and easy to follow.
Huge Thanks
11/22/2020: YEdit is available in the Eclipse Marketplace again!
pls help can get this to work
How far did you get / where did you get stuck?
Guys help me, Im stuck. When I try add external JAR in libraries tab, I can see spigot shaded file, but when I open it, it doesn’t appear in these libraries, so I cant tune the class file.